| A Marauder's Dues | |
| Quest Info | |
|---|---|
| Length | Long |
| Difficulty | Medium |
| Location | Canyon of the Lost |
| Province | Gavel |
| Combat Level | 83 |
| Starter NPC | Norsten |
| Reward | As follows:
Access through the gate to Thesead. |
A Marauder's Dues is a long level 83 quest within the Canyon of the Lost.
Preview[]
The player finds out that Norsten is being controlled by Volmor, who sees him through a crystal orb, and to vanquish Norsten of his controllant.
Stage 1[]
» Talk to Norsten.
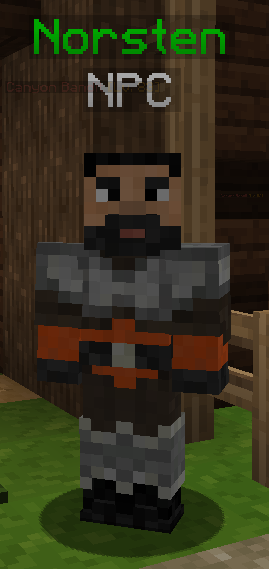
- Norsten: You there! You think you can get past me without paying, darling? I didn't think so.
- Norsten: You want to get to Thesead? That'll cost you everything you own. All of your emeralds, and your silly little armor and trinkets. All of it.
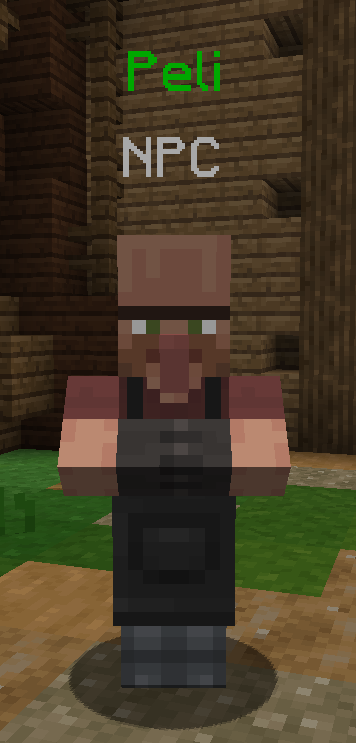
The gate behind Norsten will open with Peli coming out of it.
- Peli: Norsten? Finally! I've been looking all over for you. What are you doing here?
- Norsten: No idea who you are, but you better pay up. You used my gate without my permission! And ugh, your outfit, so drab!
- Peli: Why are you talking like that? And what do you mean, "your gate"? What's wrong with you?
- Norsten: This is MY gate, darling. Now, pay up, quickly! And don't even think about running.
- Peli: You there, small-nose. Don't you Wynn folks love helping out? Something's clearly wrong with my friend here.
- Peli: He's normally nothing like this. He doesn't try to rob people, and he CERTAINLY doesn't talk like that crazy ol- Oh! I think I know what's happening.
- Peli: See that tower up there? A crazy old wizard lives up there. I think he's mind controlling Norsten here.
- Norsten: Mind control? Silly man. I would neve- Uh, I mean, he would never do that! He's just an innocent stylish old man!
- Peli: See what I mean? There's a shortcut through the mountain over there. It'll take you straight to the path up to the wizard's tower.
- Peli: I don't care what you do with him, just make sure he lets Norsten go.
Stage 2[]
» Go up the path to the wizard's tower, at [258, 79, -4934].
- ???: Yoohoo! You there! Yes, you, with the silly soldier outfit. I see you!
- ???: I can see you! You can't hide from little old me. Come no further or I shall be forced to act!
- ???: Wait, where did you go?
- ???: You think I didn't know about those caves? You silly old goose, I'll make you suffer!
Three crystals will appear beside you, before sending you to an orange room.
- ???: And now your little mind is mine, trapped in an illusion for all time! You'll go mad trying to figure out what is real and what is not, and your mind will shatter!
Stage 3[]
» Escape the illusion.
To get out of the orange room, there will be a fake wall at the eastern end. Your objective is to find three crystals. The first challenge in the magenta room has you doing parkour on white blocks. Right-clicking the gray blocks will temporarily change the configuration of the white blocks. After getting to a pink room, there will be a crystal at the end of the parkour, which must be right-clicked to be destroyed.
After destroying the first crystal, you will then be in a lime room.
- A shard of the crystal seems to have remained behind. Perhaps you can use it somehow.
The
Crystal Shard is used so when right-clicked will change the state of yellow and purple blocks. When a block is an illusion, it will be there visually but does not exist physically, and when a block is real, you can use it physically.
Eventually, after completing the parkour in another orange room, the second crystal must be destroyed. You will then be sent to another lime room where there will be pink blocks that travel in a snake-like manner. After completing the parkour, you will then be sent to a blue room, where all of the previous mechanics come into play to reach the third and final crystal.
- ???: Oh, dearie me! Where did you come from? I thought I trapped you for good!
- ???: I'll need a more permanent solution then, won't I? Oooh, how about this?
Stage 4[]
» Run away and confront the wizard.
A large purple mass will appear behind you, and you must run away from it. Once you have ran away from it, climb up the tower where Volmor is.
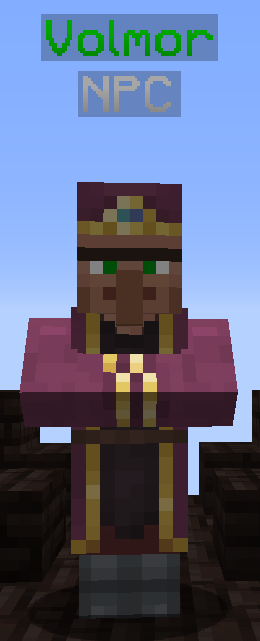
- Volmor: GAH!
- Volmor: Oh gosh, you're here! Where did I put my pink wand, I simply can't cast in black!
- Volmor: Well foof! I guess you've got me! Teehee!
- Volmor: Ohh, I do hate it when people make me give up my toys. I'll let the silly little man go.
- Volmor: Tell you the truth, his style offended me anyway. Asking people to give him money wearing that?! Ugh, hideous.
- Volmor: Well, there's no need to raise your fists, darling. I'm not going to fight you like some common ogre! Hah!
- Volmor: Here, let me get the gem. With it you can bring his free will right back to his old, unfashionable self!
Volmor will then walk to a cabinet to grab something out of it.
- Volmor: Here...
Volmor will then run and toss the item away.
- Volmor: Whoopsies! Silly old Volmor! Too much magical moisturiser again. It just slipped right out of my fingers!
- Volmor: Heehee! I guess you won't be saving him after all! It's not like you could jump in there, that's my trash! You'd get dirt all over your outfit!
Jump into the hole right below Volmor's tower. You will end up in a strange dimension after you get in the hole.
Stage 5[]
» Find a way out of the strange dimension.
- There's the strange gem that Volmor "dropped". You should take it with you, he said it would save Norsten.
Right-click on the
Strange Gem to pick it up. A nauseating aura will be applied to you, and then several Magical Disturbances will spawn.
| Image | Name | Level | Health | AI Type | Abilities | Elemental Stats | Drops | Location |
|---|---|---|---|---|---|---|---|---|
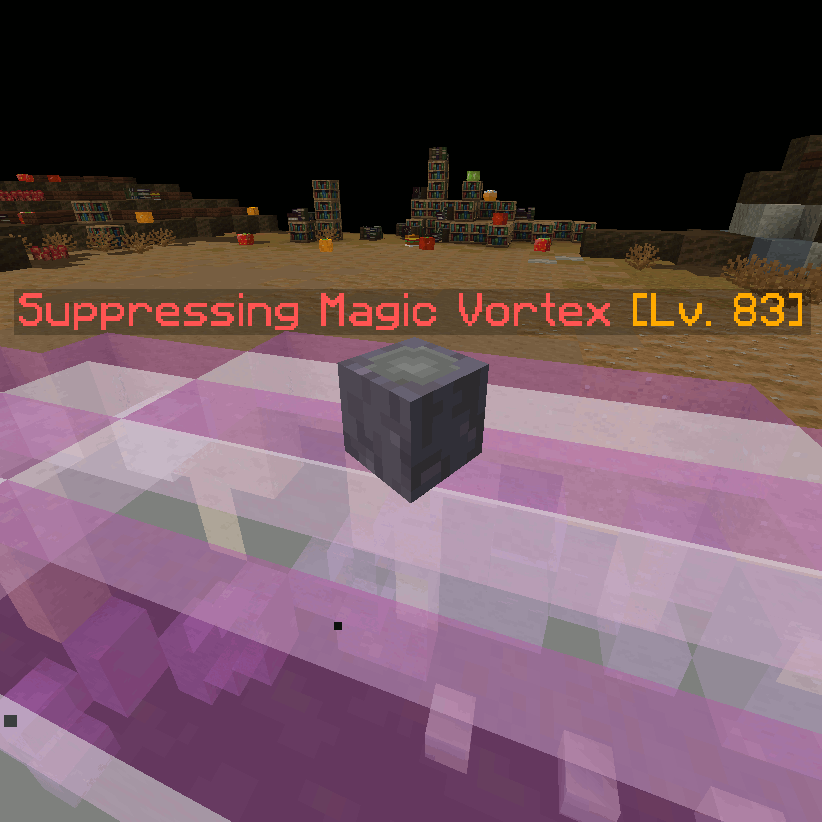
|
Suppressing Magic Vortex | 83 | 35000 | Rapid Ranged | Knockback Immune Heal |
- | - | Strange Dimension |

|
Flowing Magic Vortex | 83 | 35000 | Melee | Wave Teleport |
✽ Dam ✽ Def ❋✦ Weak |
- | Strange Dimension |
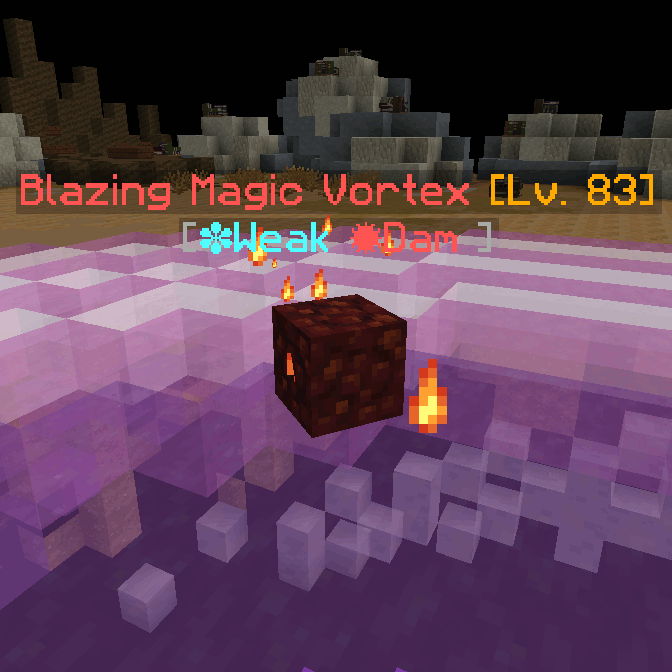
|
Blazing Magic Vortex | 83 | 35000 | Charge | Flamethrower Heavy Explode |
✹ Dam ✽ Weak |
2 Flaming Vortices | Strange Dimension |
| File:FlamingMagicVortex.png | Flaming Magic Vortex | 83 | 100000000 | Charge | Self-Destruct | ✹ Dam ✽ Weak |
2 Smouldering Vortices | From Blazing Vortex |
| File:SmoulderingMagicVortex.png | Smouldering Magic Vortex | 83 | 100000000 | Charge | Self-Destruct | ✹ Dam ✽ Weak |
- | From Flaming Vortices |
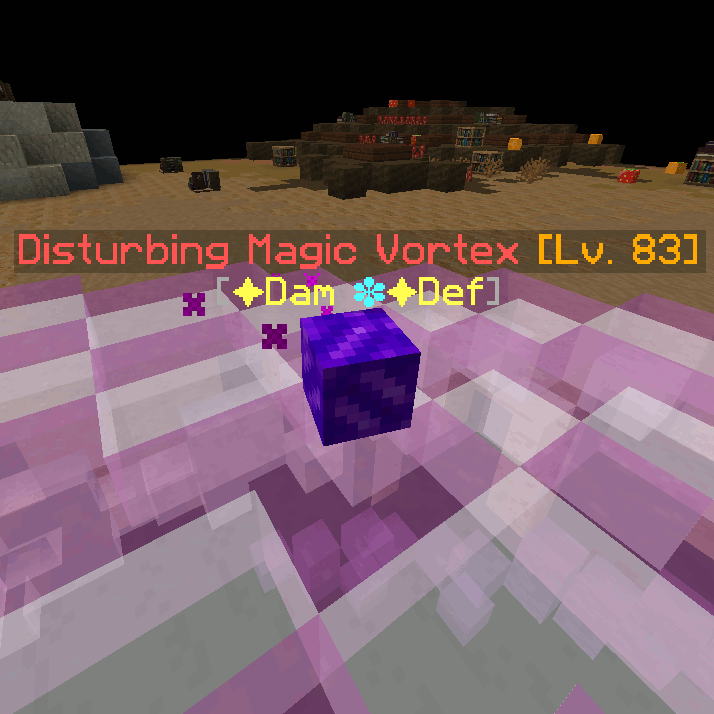
|
Disturbing Magic Vortex | 83 | 35000 | Melee | Heavy Teleport Heavy Multihit Flamethrower Meteor |
✦ Dam ✽✦ Def |
- | Strange Dimension |
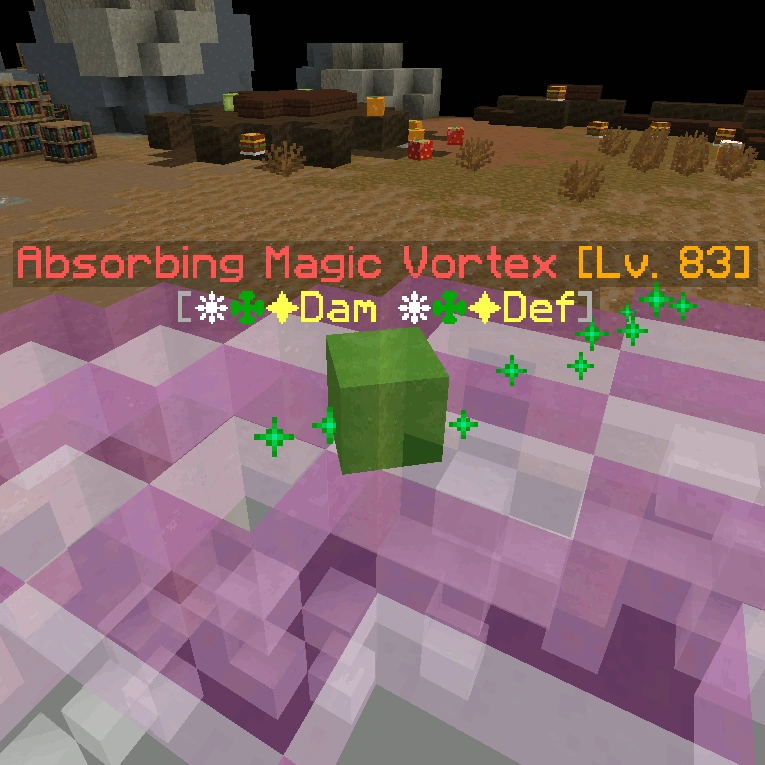
|
Absorbing Magic Vortex | 83 | 50000 | Melee | - | ❋✤✦ Dam ❋✤✦ Def |
- | Strange Dimension |
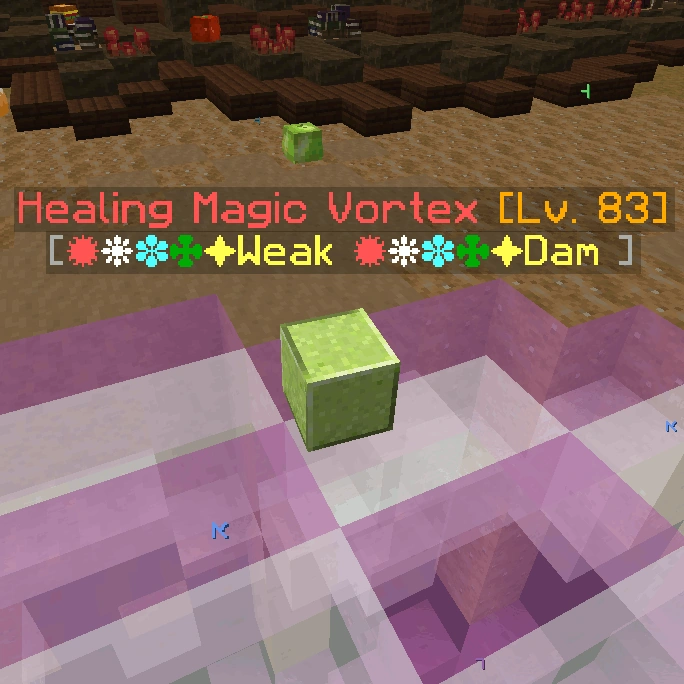
|
Healing Magic Vortex | 83 | 35000 | Support | Heavy Heal Vanish |
✹❋✽✤✦ Dam ✹❋✽✤✦ Weak |
- | Strange Dimension |
After you have defeated all of the Magical Disturbances, a puzzle will appear.
- Although the strange beings are now gone, some parts of them were left behind. They look very unstable.
- Perhaps if you combine them in the right way you can cause an explosion and escape.
- Goal: Get 100 Explosive Power by combining the 6 different cores in the grid made of green particles.
- Right Click a core to select it, the Right Click one of the 6 green spots in the grid to place it there.
- Each core gains and loses explosive power based on its position in the grid, and what cores it's touching. Each core touches the cores that are above, below, and next to it.
- Remember, you need to get 100 Explosive Power! If you need a hint, click on Hints and Rules and select "I want a hint."
Stage 6[]
» Find a way out of the strange dimension.
There will be a 2 by 3 grid with green particles where you can place the cores. To the left is a confirm button to submit your answer, and to the left is a clear mode button which can be used to remove cores from their position. On the opposite side of the area is the Hints & Rules NPC. Each Core has the following attributes:
Purple Core: +10 Explosive Power, x2 Power when touching blue
Orange Core: +5 Explosive Power, -5 Power when touching blue, +5 Power when touching purple, x2 Power when on the left
Blue Core: +10 Explosive Power, +5 Power when touching purple, x2 Power when on the right
Gray Core: +0 Explosive Power, -20 Power per core it touches that isn't rainbow
Green Core: +25 Explosive Power, -10 Power when touching orange, -5 Power when touching blue, -5 Power when touching purple
Rainbow Core: +0 Explosive Power, +20 Power when touching blue, +10 Power when touching orange, +10 Power when touching purple, +5 Power when touching green
If you fail the puzzle, you will be given a tip, such as how the total power is calculated from top to bottom for each core.
Hints and Rules NPC[]
- Do you want a hint or see the rules again?
- [1] I want a hint.
- What core do you want a hint about?
- [1] The Gray Core
- The Gray Core loses a lot of Explosive Power for every core it's touching, except Rainbow. This means the best place for it is in a corner, where it's touching only 2 cores, and one of those should be the Rainbow Core, to minimize Explosive Power lost.
- [2] The Rainbow Core
- The Rainbow Core gets big bonuses from touching other colored cores, so its best place would be in the middle, where it touches 3 different cores.
- [3] The Green Core
- The Green Core begins with a lot of power, but loses power when touching some of the other cores, especially Orange.So you'll want it in a corner, where it's touching only 2 cores, and it shouldn't be touching Orange.
- [4] The Blue Core
- The Blue Core is pretty safe, as it doesn't lose a lot of power when touching any specific core. Rainbow also gets a ton of points from it, so ideally you'll want it on the right, touching Rainbow.
- [5] The Orange Core
- The Orange Core doesn't have a lot of power on its own. However, Rainbow gets a big bonus when touching it, and Green loses a lot when touching it. So you'll want it on the left, and touching Rainbow, but not Green.
- [6] The Purple Core
- The Purple Core is pretty safe, as it doesn't lose a lot of power when touching any specific core. Both Blue Core and Orange gain bonus when touching it, so you'll want it touching one or both of those.
- [7] Nevermind.
- [1] The Gray Core
- What core do you want a hint about?
- [2] I want to see the rules of the puzzle again.
- Goal: Get 100 Explosive Power by combining the 6 different cores in the grid made of green particles.
- Right Click a core to select it, the Right Click one of the 6 green spots in the grid to place it there.
- Each core gains and loses explosive power based on its position in the grid, and what cores it's touching. Each core touches the cores that are above, below, and next to it.
- Remember, you need to get 100 Explosive Power! If you need a hint, click on Hints and Rules and select "I want a hint."
- [3] Nevermind.
- [1] I want a hint.
Spoiler alert: The hidden text contains spoilers relating to the solution to the puzzle.
|
Gray Core, Green Core
Rainbow Core, Blue Core Orange Core, Purple Core |
- [+1 Unstable Core Amalgamation]
Stage 7[]
» Escape the strange dimension.
After getting the
Unstable Core Amalgamation, place it in the center of the floor to the strange dimension. It will explode, allowing you to access the portal out of the dimension. You will land in front of the gate to Thesead where Peli and Norsten will be.
- Norsten: Huh? You again?! How did you escape from my- wait, uh, I mean... You there! Give me everything you own!
- Peli: Stop trying, you creepy old man! We all know it's not Norsten that's speaking. Anyway, human, that was quite an entrance! Did you find anything?
- Norsten: Wait, what's that? What are you doing with that gemstone? I- Agh!
- [-1 Strange Gem]
- Norsten: Ugh... Where am I...? Peli? What happened? I can't remember how I got here.
- Peli: Ah, Norsten, you're back! Finally. You won't believe it, but... You remember that crazy old wizard? He took over your body or something!
- Norsten: ...What? What do you mean?
- Peli: He took control of your body and used it to try to rob people! But, he still talked like his normal crazy self so it was immediately obvious.
- Peli: And this human here saved you! They went right up to the wizard's tower, and then a bit later came flying back out with a gemstone!
- Norsten: I'm confused... But thank you, human. It sounds like you really saved me!
- Norsten: Here, let me repay you. So, that wizard tried to use me to rob people for money, right? But I guess he didn't think to check my pockets.
- Peli: Well, that's generous. Looks like a happy ending for everyone! Come on Norsten, let's get you home.
- Norsten: Just a second, my mind's still a bit fuzzy.
Trivia[]
- Volmor's name could be a reference to Voldemort from the Harry Potter series.
- This quest was updated in 2.0. For the old version, see A Marauder's Dues (1.20).